- Design your quilt on graph paper.
Creating a to-scale drawing of your quilt allows you to see ahead of time how the finished quilt will look. You can use colored pencils or crayons to add color to your mock-up, but pieces cut from the actual fabrics are so much better!
Before you decide this is just too much work, consider that color, texture and pattern placement can be tricky. What seems to work perfectly as individual parts may be absolutely horrible when seen as a whole.
Taking the time to plan your quilt on paper allows you to play with fabric placement to see how each works with all the others. Also, you get the distance perspective without having to step back.
Trust me – you need to do this! (Seriously – you don’t want to learn this lesson by personal experience.)
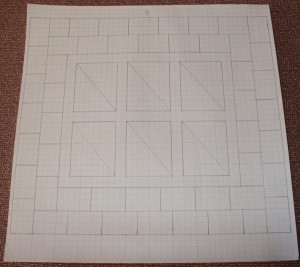
Create a Scale Drawing
I always start with graph paper, a pencil and a ruler but you could create your quilt diagram on the computer and print it out if you have the software and know how to do so. (Which I do but I still prefer to draw mine the old fashioned way.)
Make your scale drawing as large as the paper will allow. I recently discovered quilt designer’s graph paper that is 12 by12 inches, but regular 8½ by 11 inch graph paper works, too. Choose a scale that works easily with your quilt. As my quilt design is all in multiples of 3, I went with 1 square=1½ inches. Please note that had I used regular graph paper, I would have had to change the scale as my design took the full 12-inch width.

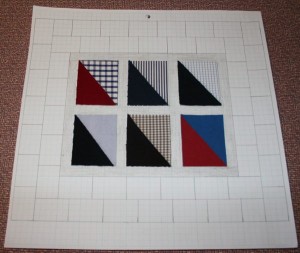
- Color in sashing; add focus fabrics.
Add the Primary Elements
There are usually set elements in a quilt design, so add these to your diagram first. I used a colored pencil for the sashing and then added fabric pieces cut to scale for my six focus blocks. In this particular quilt, the focus block placement was already determined so I just put the fabrics where they belonged. If placement is flexible for your primary quilt pieces, play around with the fabrics. Use double-stick tape to hold each piece in place. And if you need to move one, just peel it gently from the paper and re-stick it elsewhere.

- Fabric cut to scale.
Time to Play!
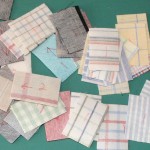
Cut fabric pieces to scale for the remaining blocks. My quilt’s double border required 50 pieces and I had 28 fabrics from which to choose. So I cut 2 to-scale rectangles from each fabric. I noted the fabric priority (either 1 or 2) on the back of each piece and added an arrow to show the correct orientation for plaids and stripes.
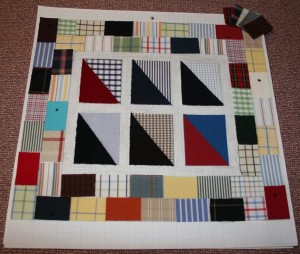
Now the fun begins! Stick a piece of double-stick tape in the center of each open spot and start arranging your fabrics. Move the fabrics around, adding new tape if the stickiness wears off. Rearrange until you are satisfied. Then walk away for a day or two so you can look at your quilt design with fresh eyes. Once you’re totally satisfied with the fabric placement, begin making your quilt.

- Your final quilt design!
Some Final Thoughts
Getting the memorial quilt design just right may take several tries – that’s why you’re doing it on paper first. Then you can use your mockup to easily create the quilt you envisioned.
Remember to take as much time as you need to perfect your design. My final quilt, for instance, underwent several more changes after the photo at right was taken. Over the course of a couple of days, I repositioned fabrics repeatedly to get a better balance between the plaids, stripes and colors. And I’m glad I did – not only was it fun, but the finished quilt is awesome!