I’m working on a memorial quilt that includes t-shirts, sweatshirts and button-front shirts. I wanted the finished quilt to be a uniform thickness despite the huge difference in the weight/thickness of the fabrics so decided to use a quilt-as-you-go method to cut, piece and quilt it in sections, and then join the sections together to create the whole. That way, I could leave the batting out of the sweatshirt and fleece sections, which makes them about the same thickness as the other fabrics layered over batting.
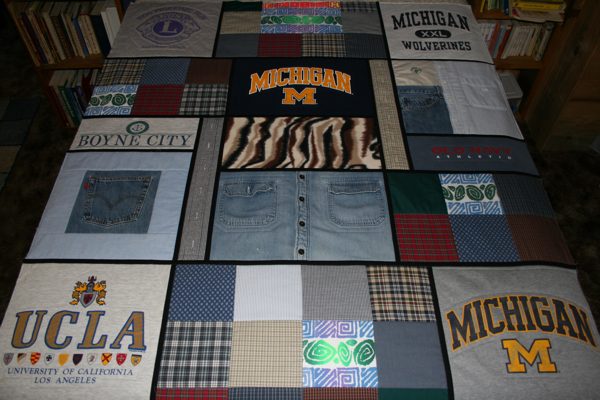
Here’s the front of the quilt:

Memorial quilt with t-shirts, sweatshirts and other clothing.
As you can see, a thin strip of black fabric separates each section and is how the sections are joined together. And I think it gives a nice frame to each section, as well.
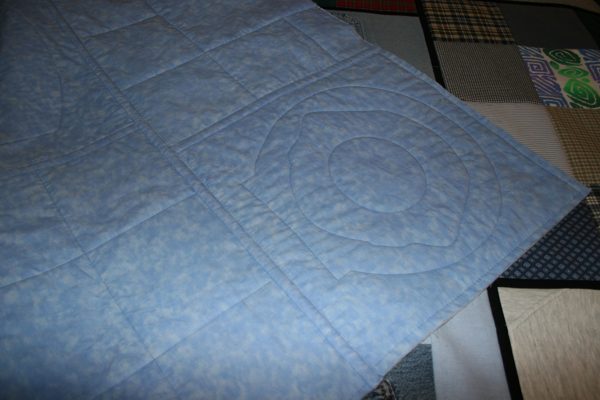
And here’s the back of the quilt:

- How the joined sections look from the back.
A strip of the backing fabric covers each join on the back. Within the sections, I stitched the second edge of the fabric strip down by hand but opted to sew it down by machine where the larger sections join.
This is just a glimpse of how using the quilt-as-you-go method works when dealing with fabrics of various weights/thicknesses. Soon I’ll post a how-to with specifics on how you can use this method to make a quilt yourself.
This is cool!
This memorial quilt is absolutely beautiful!! I am just starting a memorial quilt for a friend and your quilt has given me my inspiration!! Thank you!!!
Thanks, Cheryl – I’m currently working on two more that combine t-shirts, button fronts and jeans and I am loving this method! If you run into problems or have any questions while making the quilt for you friend, please contact me – I’m happy to help. In fact, I intend to post more how-to info eventually but quilting comes first.:)
Hi Cheryl – Interlock is a more stable knit than T-shirt jersey. It doesn’t curl at the edges and is very easy to sew. I’ve really been having a lot of fun working with it because it can be made into such a wide variety of apparel types: little tops, dresses, pants, you name it. You don’t need a serger to sew it -I’ve been using a regular sewing machine.
Your post, Combining T-shirts and Sweatshirts in a Memorial Quilt » CustomMemorialQuilts.com, is really well written and insightful. Glad I found your website, warm regards from Gale!
I have been working on putting my DGSon’s music quilt together and this is how I do this quilt-as-you-go method. There are most likely lots of ways to do it, but this is how I did mine…
The idea is to break up your quilt into sections, so that at the end of it all you do not have a great big quilt to machine quilt (or hand quilt, if that’s how you wish to go – either way it can be very hard and very tiresome on your arms and back). First off, the quilt has to broken up into sections, so you must put some thought into how you will break up the sections. On this particular quilt, I decided to make it up in three long panels the full length of the quilt – a middle panel section and two narrower panel sections on the sides. You must first piece the quilt in the sections you have decided on, sandwich the top, batting and backing sections, and then baste and quilt the sections in your chosen method. Be sure to measure and trim back the sections, making sure they will all fit together nicely.
Note: I have only one library table at home. Therefore, I have to baste in sections. If your quilt is larger than the table, be sure the top and one side are aligned with the edges, clamp around and baste what is on the surface. Unclamp everything and readjust the quilt so that unbasted areas are now on top of the table. fold back the top and batting and smooth the back into place. Fold the batting forward, then the top of the quilt and smooth away from the previously basted area. You want to be sure you are NOT creating a bubble where the first basting stopped. Repeat this procedure until the entire quilt is basted.